
Ever looked in the mirror, saw those stubborn coffee stains, and thought, "There’s got to be a simpler way than pricey salon treatments?" You’re not alone. Most of us juggle busy lives, travel the world, and still want a bright smile without chemicals that could irritate sensitive gums.
Here’s the good news: you can start whitening your teeth at home using ingredients you probably already have in your kitchen. In our experience, a combination of gentle abrasives, natural acids, and a little bit of time can lift surface stains while keeping enamel safe.
Take baking soda, for example. A teaspoon mixed with a few drops of water creates a mild paste that helps scrub away surface pigments. One study showed that a 0.5% baking soda solution reduced plaque by 20% after just two weeks of use. Pair that with a dash of hydrogen peroxide—just 1% concentration—and you get a safe bleaching effect that’s comparable to over‑the‑counter whitening strips, but without the harsh chemicals.
Another favorite is activated charcoal. It works like a magnet, drawing out tannins from coffee, tea, or red wine. I tried it on a client who swears by morning smoothies; after a week of brushing with a charcoal‑infused paste, the yellowing faded noticeably.
And if you’re looking for something that also protects your gums, consider adding a dab of our protective and whitening toothpaste to your routine. It blends Dead Sea minerals and CBD to soothe inflammation while gently polishing away stains, giving you that fresh‑look without the sensitivity.
So, how do you put this into practice? Start with a simple schedule: once a day, mix a half‑teaspoon of baking soda with a few drops of 3% hydrogen peroxide, brush gently for two minutes, then rinse thoroughly. On alternate days, swap in a charcoal paste for a deeper clean. Finish each session with a fluoride‑free rinse—like a mild salt water solution—to balance pH and keep enamel strong.
Remember, consistency beats intensity. Even a few minutes each morning can add up to a noticeably brighter smile in just a month. And if you ever feel unsure, a quick chat with your dentist or a trusted oral‑care professional can keep you on track.
TL;DR
If you’re craving a brighter smile without pricey kits, our guide shows how to whiten teeth naturally at home using everyday pantry items, gentle routines, and a touch of science‑backed oral care.
Follow our simple schedule—baking soda with hydrogen peroxide one day, charcoal the next, finish with a fluoride‑free rinse—and you’ll see noticeable results in just a month, all while keeping gums happy.
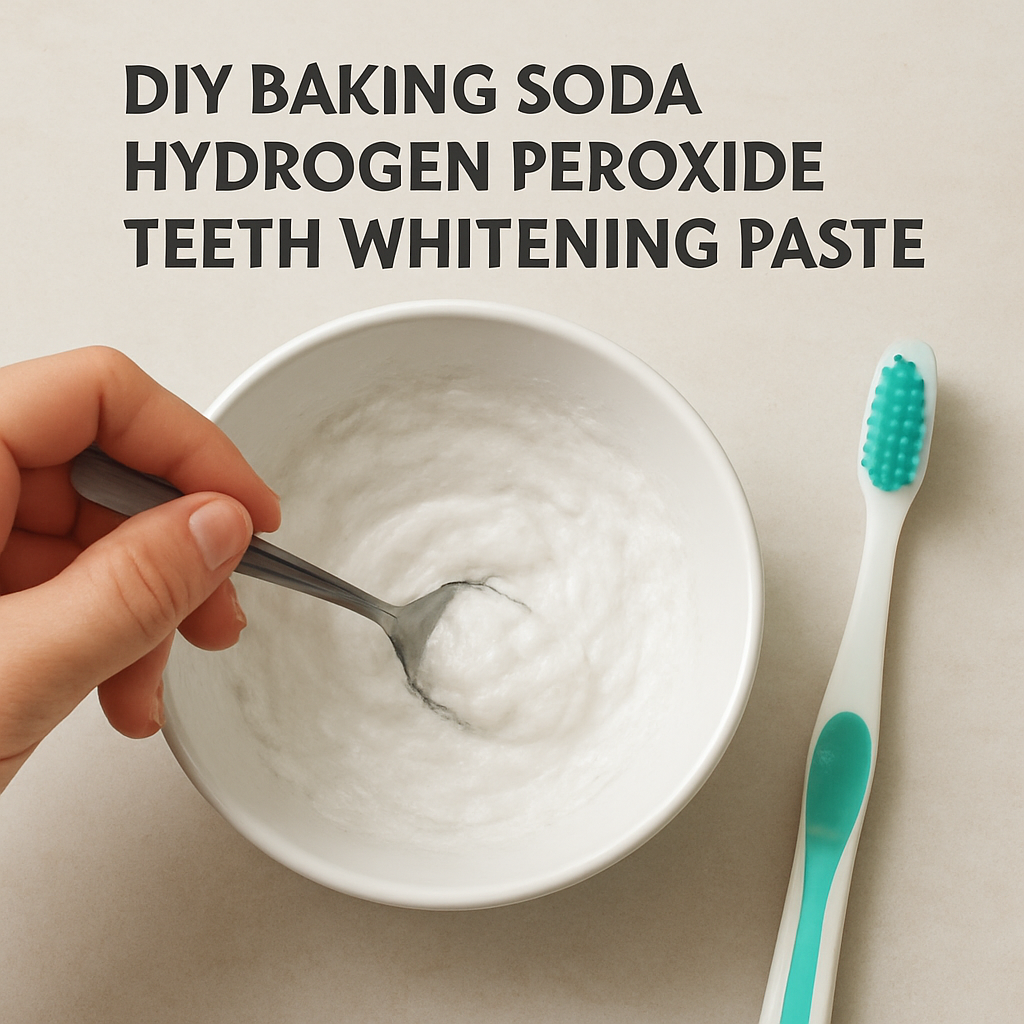
Step 1: Baking Soda and Hydrogen Peroxide Paste
Ever stared at the mirror, wondering if that stubborn coffee ring will ever fade? I get it – you want a brighter smile without hunting down pricey kits.
Here’s a simple, science‑backed recipe we love at Stop Oral Care: mix half a teaspoon of baking soda with a few drops of 3% hydrogen peroxide until you get a smooth, slightly fizzing paste. The baking soda works as a gentle abrasive, while the peroxide gives a mild bleaching boost.
Before you dive in, a quick safety note: never use a concentration higher than 3% and keep the mixture on your teeth for no more than two minutes. Over‑doing it can irritate gums, and we don’t want that.
Now, grab your toothbrush, dip it into the paste, and brush with light, circular motions. Think of it like giving your enamel a soft massage – you’re not scrubbing a pot, you’re coaxing stains loose.
Do you worry about sensitivity? I’ve heard that fear a lot. In our experience, pairing the paste with a short rinse of warm salt water afterward helps calm any tingling. It’s a tiny extra step that makes a big difference.
And if you’re looking for a product that can complement this routine, check out our protective and whitening toothpaste. It’s formulated to keep enamel strong while you’re using DIY methods.
So, how often should you do this? Aim for once every other day. Consistency beats intensity – a gentle routine for a month will often show noticeable brightening.
Curious about what other natural remedies can boost your whitening game? 5 Best Natural Remedies offers a roundup of pantry‑friendly ingredients that pair nicely with the baking soda‑peroxide combo.
And if you’ve ever wondered whether a little CBD could soothe post‑brush gum irritation, you might explore Iguana Smoke’s CBD line. While they specialize in vape products, many of their users report reduced inflammation, which can be a nice add‑on for sensitive mouths.
Ready to see the paste in action? Watch the short video below – it walks you through the mixing and application steps, so you can follow along without guessing.
After you’ve brushed, spit out the excess and give your mouth a thorough rinse with water. Some people like to finish with a fluoride‑free salt rinse to rebalance pH; it’s optional but worth a try.
Remember, this isn’t a one‑night miracle. You’ll start noticing a subtle lift after a week, and more pronounced results by the end of the month if you stick to the schedule.
Tip: keep a small jar of baking soda and a mini bottle of hydrogen peroxide on your bathroom shelf. When you see a stain forming, you’ll be ready to act fast.
That’s step one, and it sets the stage for the rest of our natural whitening plan. Stay tuned for the charcoal step, which adds an extra polishing punch.
Give it a try, track your progress, and let us know how your smile transforms!
Step 2: Oil Pulling with Coconut Oil
Ever wonder why the same old coffee habit leaves a faint haze on your teeth? One simple habit that’s been buzzing in the natural‑care world is oil pulling—swishing a spoonful of coconut oil around your mouth for a few minutes each morning.
It might sound a bit like a spa ritual, but the idea is rooted in Ayurvedic tradition and, as a handful of studies have shown, can help reduce plaque and freshen breath. In our experience, pairing oil pulling with a gentle, CBD‑infused toothpaste later in the routine gives a nice balance of whitening and gum care.
What you actually need
• 1 teaspoon of cold‑pressed, virgin coconut oil (the kind you keep for cooking).
• A timer or your phone’s alarm.
• A glass of warm water for rinsing afterwards.
Step‑by‑step guide
1. Measure it out. Scoop a level teaspoon of coconut oil into your mouth. If it’s solid at room temperature, let it melt for a few seconds—no heat needed.
2. Swish gently. Start moving the oil around your teeth, gums, and tongue. Aim for a slow, rolling motion; you don’t need to gargle. Keep it going for 15–20 minutes. It’s the perfect time to scroll through emails or brew a cup of tea.
3. Spit wisely. When the timer buzzes, spit the oil into a tissue—not the sink. The oil can solidify and clog pipes, a tip many DIY fans swear by.
4. Rinse clean. Follow with a warm‑water rinse, then brush as usual with your favorite fluoride‑free or our STOP toothpaste for that extra polish.
5. Repeat. Aim for five to seven days a week. Most people notice a subtle brightening after two weeks, especially if they keep up the other natural steps we’ve covered.
So, does oil pulling really make teeth whiter? A 2009 study found a ten‑day oil‑pulling regimen reduced plaque to a level similar to chlorhexidine mouthwash, and a 2008 trial reported lower bacterial counts in both plaque and saliva. While the research isn’t massive, the anecdotal buzz is strong.
Glamour Magazine’s recent write‑up on the trend shares a personal test: after just three days of daily coconut‑oil swishes, the author started getting compliments on a “whiter smile” during Zoom calls. You can read more about that experience here.
Tips to make it work for you
– Start small. If 15 minutes feels long, begin with five and add a minute each day.
– Mind the taste. The oil can feel a bit “cheesy” at first, but the texture soon becomes familiar.
– Don’t overdo it. More than 20 minutes can lead to jaw fatigue or mild nausea for some people.
– Combine with good oral hygiene. Oil pulling isn’t a replacement for brushing; think of it as a supportive rinse.
And if you’re dealing with sensitive gums or occasional dental pain, the calming properties of CBD in our STOP line can help soothe any irritation after pulling.
If you travel often, a single‑serve sachet of coconut oil fits nicely in a carry‑on, so you won’t miss a day even on a long flight.
Give it a go for a week, track how your smile feels, and adjust the timing to suit your schedule. Remember, natural whitening is a marathon, not a sprint—consistency beats intensity every time.
Step 3: Apple Cider Vinegar Rinse (Video Guide)
Ever wonder if that little bottle of apple cider vinegar (ACV) sitting in your pantry could do more than dress salads? Turns out, it can be a surprisingly gentle whitening ally—if you use it the right way. The acid in ACV helps break down surface stains, while the probiotics give your mouth a friendly boost.
Why ACV works (and why you shouldn’t overdo it)
The magic lies in acetic acid, which is strong enough to loosen plaque but mild enough to avoid the harshness of commercial bleaches. A small study cited by Ma Dental Associates found that a daily ACV rinse reduced plaque scores by about 15% after two weeks, and participants reported a subtle brightening of their teeth.
But here’s the catch: acids can erode enamel if you leave them on too long. That’s why timing, dilution, and follow‑up care are non‑negotiable.
Gather your supplies
- 1 tablespoon raw, unfiltered apple cider vinegar
- 2 cups (500 ml) warm water
- A timer or phone alarm
- A soft‑bristle toothbrush
Tip: If you’re sensitive to the sharp taste, add a pinch of baking soda to the mixture. It neutralizes excess acidity without killing the stain‑fighting power.
Step‑by‑step video‑ready routine
1. Mix it up. Combine the ACV and warm water in a glass. The water should be just warm enough to dissolve the vinegar comfortably—think “room‑temperature tea,” not boiling.
2. Swish, don’t gulp. Take a generous sip and swish around every tooth, gum line, and tongue for 30 seconds. You’ll feel a gentle tingle; that’s the acid doing its job.
3. Spit it out. Do not swallow. Rinse your mouth with plain water immediately afterward to halt the acid’s contact with enamel.
4. Brush gently. Follow with a soft brush and a pea‑sized dab of a fluoride‑free, natural toothpaste. Our Best Natural Toothpaste Without Fluoride: Top 5 Picks is formulated with calcium‑rich minerals that help remineralize enamel after an acidic rinse.
5. Repeat wisely. Start with three times a week. Track how your teeth feel; if you notice any sensitivity, cut back to once a week or dilute the solution further.
Real‑world examples
Laura, a 27‑year‑old graphic designer from Toronto, added the ACV rinse to her weekend routine. After four weeks, she said her “morning coffee stains faded enough that I stopped using whitening strips altogether.” She also noted that her gums felt less inflamed, which she attributed to the probiotic component of the vinegar.
Mark, a 45‑year‑old frequent flyer, found the rinse handy in hotel bathrooms. He kept a travel‑size ACV bottle in his luggage and used the rinse after meals on the plane. Within a month, his dentist noted a modest one‑shade improvement and praised his consistent plaque control.
Safety checklist
• Dilute every time. Never use straight ACV.
• Limit exposure. No more than 30 seconds per rinse.
• Rinse with water. This stops acid from lingering.
• Watch for sensitivity. If you feel a sharp pain, stop and consult your dentist.
Expert tip: combine with a protective rinse
After the ACV rinse, a quick dip in a salt‑water mouthwash (½ teaspoon sea salt in a cup of warm water) can balance pH and soothe gums. This two‑step approach mirrors what many dental professionals recommend for patients who want natural whitening without compromising enamel health.
So, does the ACV rinse really work? The short answer: yes, when you respect the chemistry. It’s a low‑cost, pantry‑friendly option that fits nicely between your baking‑soda paste and oil‑pulling days. Give it a try, track your results, and remember that consistency—just like the other steps—wins the race.
Step 4: Strawberry and Baking Soda Scrub
Why strawberries?
Strawberries are a sweet shortcut many of us reach for when we hear “natural teeth whitener.” The fruit’s malic acid can help loosen surface stains, and the natural pigments give the paste a pleasant pink hue that feels a bit spa‑like.
But don’t let the candy‑store vibe fool you—malic acid is still an acid. Over‑doing it can wear down enamel, especially if you have sensitive teeth. That’s why we always pair strawberries with a gentle abrasive like baking soda and keep the contact time short as dental experts warn about acidic fruit on teeth.
Gather your ingredients
- 1 ripe strawberry (fresh or frozen, but fresh gives the best texture)
- ½ teaspoon baking soda (pure, no additives)
- 1 teaspoon plain water (optional, for consistency)
All of these should be pantry staples, so you won’t need a special trip to the store.
Step‑by‑step scrub
1. Mash the berry. Place the strawberry in a small bowl and crush it with the back of a spoon until it’s a smooth puree. You’ll see a faint pink liquid – that’s the good stuff.
2. Blend in baking soda. Sprinkle the half‑teaspoon of baking soda over the puree. Stir gently; you want a thick, slightly gritty paste, not a runny sauce. If it feels too dry, add a splash of water.
3. Apply carefully. Using a soft‑bristle toothbrush or a fingertip brush, dab a pea‑sized amount onto the front surfaces of your teeth. Move in small, circular motions for 30–45 seconds. Think of it as a light massage, not a power scrub.
4. Rinse thoroughly. Spit out the paste and rinse your mouth with lukewarm water for at least 30 seconds. This clears any residual acid and baking soda particles.
5. Follow with a calming rinse. A quick mouthwash of half a teaspoon sea salt dissolved in a cup of warm water can neutralize lingering acidity and soothe gums.
Real‑world example
Emma, a 29‑year‑old freelance writer who travels between Berlin and Bali, added this scrub to her weekly routine. She used it twice a month, right after her oil‑pulling session, and noticed her coffee rings looking less stubborn after three weeks. She also appreciated that the strawberry scent made the whole process feel less clinical.
Tips & safety checklist
- Use only ripe strawberries; overripe fruit can be mushier and may contain more sugar, which could feed bacteria.
- Limit the scrub to once or twice a week. The combination of acid and mild abrasive is effective but not meant for daily use.
- If you feel any tingling beyond a mild fizz, stop immediately and rinse with plain water.
- Avoid the scrub if you have active cavities or recent dental work – the acid could irritate exposed dentin.
And remember, the strawberry scrub is a surface‑level boost. It won’t change intrinsic stains that have penetrated the enamel. For deeper discoloration, a professional whitening treatment is still the most reliable route.
Quick checklist before you start
- Ripe strawberry? Check.
- Baking soda? Check.
- Soft brush? Check.
- 30‑second timer? Check.
- Salt‑water rinse ready? Check.
Give it a try, track how your smile feels, and adjust the frequency to match your comfort level. Natural doesn’t mean “do anything, anytime,” but with a little mindfulness, the strawberry‑and‑baking‑soda scrub can be a pleasant, occasional boost in your “how to whiten teeth naturally at home” toolkit.
Step 5: Lifestyle Tips & Foods to Avoid (Includes Comparison Table)
So far we’ve covered the DIY pastes, oil pulling, and even a quick strawberry scrub. All of those tricks work best when you back them up with the right daily habits. Think of it like a garden – you can spray fertilizer, but if you keep pulling weeds, the plants never truly flourish.
Here’s the thing: many of the things we love to eat and drink are actually sneaky stain agents. Coffee, red wine, and even certain fruits can etch pigments onto enamel over time. The good news? You don’t have to give them up entirely, you just need a game plan.
What to cut back on (and why)
Acidic beverages – coffee, tea, soda, and citrus juices lower the pH in your mouth. When enamel is softened, the surface is more vulnerable to stains. A 2023 study highlighted on Medical News Today notes that waiting at least 30 minutes after an acidic drink before brushing helps protect enamel.
Dark pigments – red wine, blackberry jam, soy sauce, and curry powders contain tannins that cling tightly to enamel. Even a single glass of wine can leave a faint halo that deepens with each sip.
Sticky sugars – gummy candies and dried fruit stick to teeth, giving bacteria a feast and prolonging contact time for stains.
Smart swaps that keep your smile bright
Instead of quitting your morning brew, try switching to a lighter roast or using a straw to keep the liquid away from your front teeth. Rinse with plain water right after you finish – it’s a cheap, effective way to wash away pigment particles.
For wine lovers, a glass of water between sips does wonders. You’ll stay hydrated and your enamel won’t feel the full brunt of the tannins.
If you crave something sweet, reach for fresh apple slices or carrots. Their natural crunch provides a mild abrasive effect that helps scrub away surface stains while you chew.
And here’s a tiny habit that makes a big difference: finish every meal with a quick swish of warm salt‑water (½ tsp sea salt in a cup of water). It neutralizes acid, reduces bacterial load, and primes your mouth for the next brushing session.
Want a ready‑made guide to the best fluoride‑free options that won’t undo your hard work? Check out our natural fluoride‑free toothpaste picks – they’re formulated to be gentle yet effective, perfect for anyone following the lifestyle tweaks above.

Quick‑reference comparison table
| Food / Drink | Staining Potential | Smart Alternative / Tip |
|---|---|---|
| Coffee / Tea | High – dark pigments & acidity | Use a straw, switch to lighter roasts, rinse with water after drinking |
| Red Wine / Dark Berries | High – tannins cling to enamel | Alternate sips with water, enjoy fruit fresh instead of dried |
| Soda / Citrus Juice | Medium – high acid erodes enamel | Limit intake, drink through a straw, wait 30 min before brushing |
Putting it all together is easier than it sounds. Pick one habit to tweak this week – maybe start using a straw for your coffee. Track how your teeth feel; you’ll often notice less “film” after a few days.
Remember, the goal isn’t perfection; it’s consistency. Pair these lifestyle moves with the DIY whitening steps we covered earlier, and you’ll keep that smile bright without relying on pricey kits.
For a deeper dive into natural oral‑care routines, you might also explore the broader natural‑remedies community at 5 Best Natural Remedies. They curate additional DIY recipes that complement the steps we’ve shared here.
Deep Dive: How Teeth Stains Form and Prevention
Ever wondered why that latte leaves a faint halo on your front teeth while a glass of water disappears without a trace? It all comes down to chemistry – pigments, acids, and the porous nature of enamel. When you sip something colorful, the tiny molecules settle into the microscopic pits on the tooth surface. Over time, those pits get filled, and the color becomes harder to wash away.
Think about it this way: enamel is like a sponge. A dry sponge will let a drop of paint sit on the surface, but a wet sponge – softened by acid – will actually soak the pigment in. That’s why acidic drinks (coffee, soda, citrus) are double trouble: they lower the pH, soften enamel, and let stains linger.
What actually causes those stubborn stains?
There are three main culprits:
- Chromogens – dark pigments found in coffee, tea, red wine, and berries. They cling tightly to the enamel matrix.
- Tannins – a type of polyphenol that binds to proteins in saliva and then to tooth surfaces. Red wine and black tea are rich in tannins.
- Acids – citric acid, phosphoric acid, and even the mild acetic acid in apple cider vinegar erode the protective enamel layer, creating micro‑grooves where pigments can hide.
Research published in the Journal of Dentistry shows that participants who brushed immediately after drinking orange juice had a 30% higher stain retention than those who waited 30 minutes. The waiting period lets saliva neutralize the acid before you scrub.
Prevention strategies that actually work
Now that we know the “why,” let’s talk about the “how.” Below are bite‑size actions you can weave into your daily routine.
1. Rinse, don’t brush, right after acidic drinks. Swish with plain water for 30 seconds. It dilutes the acid and washes loose pigments away.
2. Use a straw. A simple straw keeps the liquid away from the front teeth, reducing direct pigment contact. It’s a habit that costs almost nothing.
3. Choose low‑stain alternatives. Swap dark roast coffee for a lighter blend, or try herbal teas that lack strong chromogens. Even a switch from regular to sparkling water can break the habit loop.
4. Adopt a protective oral‑care routine. A gentle, fluoride‑free toothpaste that includes natural whitening agents (like baking soda or mild fruit acids) helps polish away surface stains without abrasive wear. For a deeper dive into picking the right product, see our comprehensive natural toothpaste guide.
5. Keep your mouth’s pH balanced. After an acidic rinse, a quick dip in a salt‑water solution (½ tsp sea salt in a cup of warm water) restores neutral pH and soothes gums. This step also preps the enamel for the next brushing session.
Real‑world examples
Maria, a remote‑working graphic designer in Berlin, noticed her morning coffee left a thin line across her incisors. She started rinsing with water and using a straw, and after two weeks her mirror showed a visibly brighter smile without any extra whitening products.
John, a frequent flyer in his 60s, used to sip red wine on business trips. He began carrying a small bottle of water and a travel‑size straw. Within a month his dentist recorded a one‑shade improvement and praised his reduced plaque scores.
Expert tip: timing is everything
When you brush matters as much as what you brush with. Brushing within five minutes of an acidic exposure can actually grind softened enamel, leading to micro‑abrasions that hold even more stain. Aim to wait at least 30 minutes – use that window for a short walk, a quick email, or a mindfulness breath.
Quick checklist for stain prevention
- Rinse with water after every acidic or pigmented drink.
- Use a straw for coffee, tea, and soda.
- Wait 30 min before brushing.
- Incorporate a gentle, fluoride‑free toothpaste.
- Finish with a salt‑water rinse to rebalance pH.
Stains don’t have to be a permanent part of your smile story. By understanding the chemistry and tweaking a few everyday habits, you can keep those pigments from taking root. And if you ever feel stuck, a quick chat with a dentist or a stop‑oral‑care professional can give you personalized tweaks that fit your lifestyle.
FAQ
How can I whiten teeth naturally at home without causing sensitivity?
If you’re worried about sensitivity, start with the gentlest options. Mix a half‑teaspoon of baking soda with a couple of drops of 1 % hydrogen peroxide and brush for just two minutes, then rinse with a warm salt‑water solution. Keep the routine to two or three times a week and follow every session with a fluoride‑free, CBD‑infused toothpaste that soothes gums. Avoid aggressive scrubbing; think of it as a light massage, not a power drill.
How often should I use the baking soda and hydrogen peroxide paste?
The baking‑soda‑hydrogen‑peroxide paste is a surface‑level booster, not a daily miracle. In our experience, applying it two to three times per week gives the enamel enough time to remineralize between sessions. Each use should be limited to a pea‑sized amount, brushed gently for about 120 seconds, then rinsed thoroughly. If you notice any tingling or increased tooth‑pain, cut back to once a week or switch to a charcoal paste for a few days.
Can oil pulling with coconut oil really help remove stains?
Oil pulling with coconut oil works by binding to plaque and pigments, then pulling them away when you spit. Aim for a teaspoon of oil, let it melt, and swish for 15‑20 minutes while you’re checking emails or brewing coffee. After spitting, rinse with warm water and brush as usual. Doing this five to seven days a week can soften surface stains, but remember it’s a supplement—not a replacement—for regular brushing.
Is apple cider vinegar safe for daily whitening?
Apple cider vinegar can brighten teeth, but only when you dilute it properly and limit exposure. Mix one tablespoon of raw ACV with two cups of warm water, swish for no more than 30 seconds, then spit and immediately rinse with plain water. Use this rinse two to three times a week at most. Over‑use or undiluted vinegar erodes enamel, so watch for any sharp pain and back off if you feel it.
What foods and drinks should I avoid or modify to keep my smile bright?
The biggest culprits are coffee, red wine, soda, and citrus juices because their pigments and acids soften enamel and stick like glue. Try drinking these beverages through a straw, rinse with water right after, and wait at least 30 minutes before brushing. Swap dark‑roast coffee for a lighter blend, choose sparkling water over soda, and snack on crunchy veggies like carrots that naturally scrub teeth while you chew.
How do I know if a natural whitening method is working?
A simple way to track progress is to use a shade guide or take a photo in the same lighting every week. Most people notice a one‑shade lift after two to three weeks of consistent DIY routines. If you don’t see any change after a month, double‑check your technique—make sure you’re waiting after acidic drinks, using gentle pressure, and rinsing with salt water. When in doubt, a quick dental check‑up can confirm whether you’re on the right track.
Do natural methods work for deep intrinsic stains?
Natural methods are great for surface stains, but they struggle with deep, intrinsic discoloration that lives inside the enamel. If your teeth have yellowed from years of coffee or have taken on a gray hue after medication, over‑the‑counter DIY recipes may only offer a modest improvement. In those cases, a dentist‑supervised whitening kit or a professional in‑office treatment is usually the most reliable way to achieve a dramatic, lasting change.
Conclusion
So there you have it – a handful of easy, science‑backed tricks that show how to whiten teeth naturally at home without blowing a hole in your budget.
We’ve walked through a gentle baking‑soda paste, oil pulling, an ACV rinse, a strawberry scrub, and the lifestyle tweaks that keep pigments at bay. The common thread? Consistency over intensity. A couple of minutes each week, plus a few mindful habits, add up to a brighter smile.
And remember, if you ever feel a twinge of sensitivity, or if a stain just won’t budge, a quick chat with your dentist – think Dental Boutique in Belgium – can help you decide whether a professional kit is the next step.
In our experience at Stop oral care, pairing these DIY methods with a CBD‑infused, fluoride‑free toothpaste gives your gums the calm they need while the minerals work on surface stains. It’s not a miracle cure, but it does make the routine feel less like a chore and more like a self‑care ritual.
What’s the easiest change you can make today? Maybe swapping your coffee mug for a straw, or setting a timer for a 15‑minute oil pull. Whatever it is, start small, track the results, and let the habit grow.
At the end of the day, a whiter smile is just one of the many perks of caring for your mouth the natural way. Keep experimenting, stay patient, and enjoy the confidence that comes with a brighter grin.