
Ever caught yourself reaching for a bottle of mouthwash, only to feel that dry, sticky sensation afterwards?
That moment is all too familiar for anyone dealing with chronic dry mouth, whether you’re a frequent traveller, a busy professional, or someone managing medication side‑effects. The discomfort isn’t just about the lack of saliva – it can amplify plaque, trigger bad breath, and make everyday meals feel like a chore.
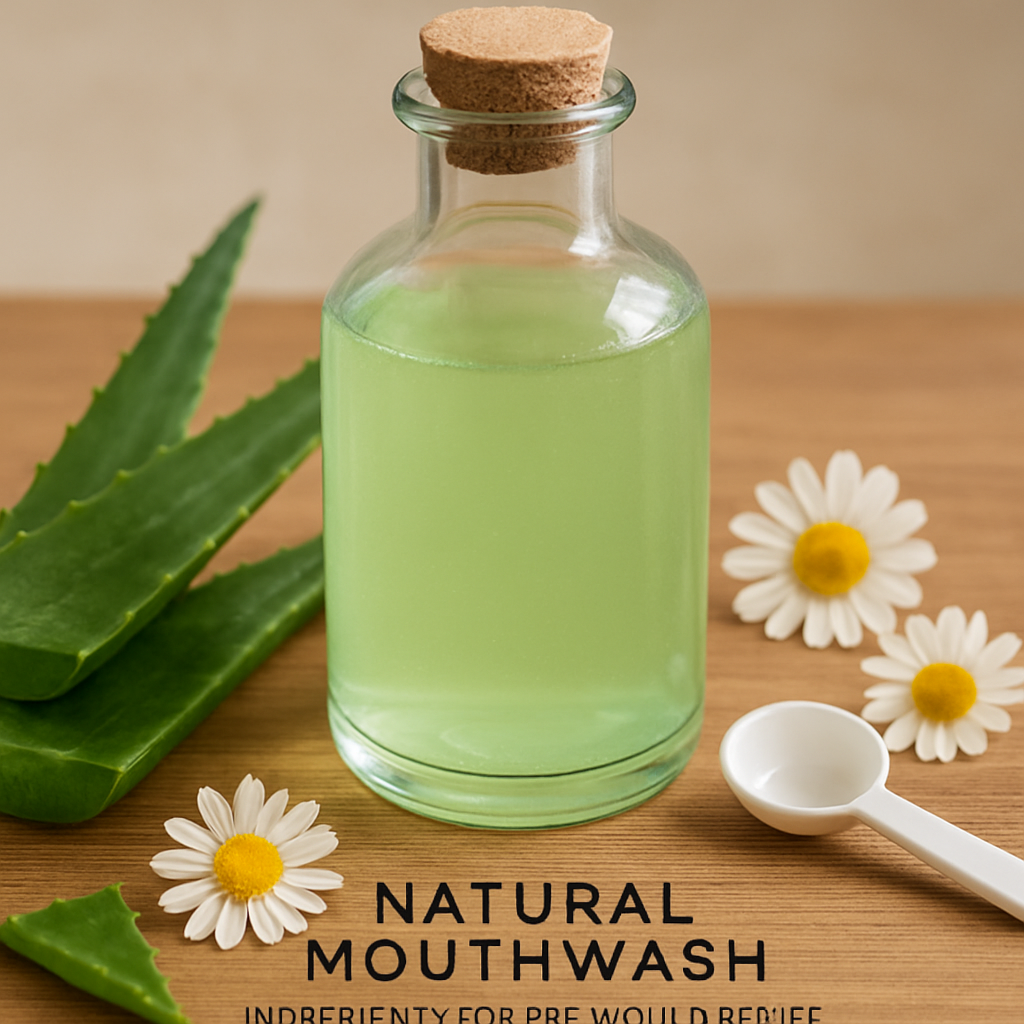
What if the solution didn’t involve harsh alcohol or artificial sweeteners, but rather a gentle, plant‑based rinse that actually supports moisture? At Stop oral care we’ve seen natural mouthwashes work wonders when they combine soothing ingredients like aloe vera, glycerin, and a touch of CBD to calm inflammation while keeping the mouth’s pH balanced.
Think about the last time you brushed and felt that fresh, clean finish. Now imagine extending that feeling with a rinse that not only freshens but also hydrates. No burning, no metallic aftertaste – just a subtle, soothing flavour that makes you look forward to the routine.
In our experience, the most effective natural formulas are those that avoid sodium lauryl sulfate, alcohol, and synthetic flavours. Instead, they rely on botanical extracts, sea‑mineral blends, and humectants that attract water to the oral tissues. This approach mirrors what dental clinics recommend for patients with xerostomia, yet it’s easy enough to use at home.
So, are you ready to swap that astringent mouthwash for something that feels more like a caring sip? Over the next sections we’ll walk you through the key ingredients to look for, simple DIY recipes, and how to choose a ready‑made product that aligns with your lifestyle – whether you’re in Brussels, Berlin or beyond.
Let’s dive in and discover how a natural mouthwash for dry mouth can turn an everyday chore into a moment of genuine relief today again.
TL;DR
If you struggle with that sticky, uncomfortable feeling after brushing, a natural mouthwash for dry mouth can soothe, hydrate, and freshen without alcohol or harsh chemicals.
We’ll show you the key ingredients, simple DIY recipes, and how to pick a ready‑made formula that fits your lifestyle, so you can enjoy a gentle, effective rinse every day.
Step 1: Choose the Right Natural Ingredients
Ever opened a bottle of mouthwash and felt like you just swallowed a mouth‑drying cocktail? Yeah, I’ve been there. The good news is you don’t have to settle for that astringent feeling. By picking the right natural ingredients, you can turn a rinse into a soothing sip that actually helps your mouth retain moisture.
Identify your moisture needs
First, ask yourself what your mouth is missing. Are you dealing with medication‑induced dryness, or is it more of a night‑time issue? Pinpointing the root cause helps you decide whether you need a humectant that pulls water into the oral tissues, or an anti‑inflammatory botanical that calms irritation. Most people find that a combination works best – a little glycerin for hydration plus a calming plant extract.
Pick effective humectants
Glycerin, aloe vera juice, and xylitol are the holy trinity for dry‑mouth relief. Glycerin is a sugar‑alcohol that attracts water, keeping the lining of your mouth supple. Aloe vera adds a silky texture and a dose of natural anti‑inflammatory compounds. Xylitol not only sweetens without sugar, it also encourages saliva flow. If you’re curious about the exact ratios, check out our guide Natural Mouthwash for Dry Mouth: How to Make and Choose the Best Options – it walks you through the math without the jargon.
Add soothing botanicals
Next, think about herbs that calm and protect. Chamomile, calendula, and green tea extract are all gentle on sensitive gums and have mild antimicrobial properties. For a little extra zing, a drop of peppermint oil can freshen without the burn you get from high‑alcohol formulas. If you enjoy a holistic approach, you might also explore how frequency‑based wellness tools complement oral health – the Healy Frequency Device is often mentioned alongside natural mouth rinses in wellness circles.
When you blend these ingredients, keep the pH around 6.5 to 7.0. That’s the sweet spot where your mouth feels comfortable and the enamel stays protected. Use distilled water as your base to avoid mineral deposits, and whisk everything together gently – no need for a blender, a simple bottle shake does the trick.
Watch the short video above for a visual walkthrough of the mixing process. Seeing the texture change as you add glycerin can be surprisingly satisfying, and it helps you avoid over‑diluting the formula.
Once you’ve got your blend, store it in a dark glass bottle to protect the delicate botanicals from light. For those who love a full‑body wellness routine, consider pairing your mouthwash with other proactive health resources – XLR8well offers a range of tools and tips that keep your entire system humming.
Finally, a quick tip: test your mouthwash on a small area of your palate first. If it feels soothing after a minute, you’re good to go. If it feels too thick, add a splash more distilled water and give it a shake. Remember, the goal is a rinse that feels like a gentle hug for your mouth, not a harsh slap.
Now you’ve got a solid foundation for choosing the right natural ingredients. In the next step we’ll dive into how to actually mix them into a safe, effective formula you can use every day.
Step 2: Prepare Your Homemade Mouthwash
Alright, you’ve picked the ingredients, now it’s time to turn them into a rinse that actually feels like a soothing sip instead of a chemical shock. The magic isn’t in a fancy bottle – it’s in a few mindful steps that keep the formula stable and the taste pleasant.
First, gather a clean glass bottle with a tight‑‑fitting cap. A 250 ml amber bottle works well because it blocks light that can degrade delicate botanicals. If you don’t have amber, a plain PET bottle will do; just store it in a dark cabinet.
Step‑by‑step mixing guide
- Measure 200 ml of distilled or filtered water into a small mixing bowl. Distilled water ensures no extra minerals interfere with the pH balance.
- Add ½ tsp fine sea‑salt and ¼ tsp baking soda. Stir until completely dissolved – this creates a mineral base that mimics natural saliva electrolytes.
- Drop in 1 tsp vegetable glycerin. Glycerin is the humectant that draws moisture to the oral tissues. You’ll notice the liquid getting a bit thicker; that’s exactly what you want.
- Stir in 1 tsp aloe vera gel (or the equivalent powder pre‑dissolved in a splash of warm water). Aloe brings anti‑inflammatory comfort and a subtle cooling feel.
- If you enjoy a hint of flavour, add 3–5 drops of food‑grade peppermint essential oil. It’s optional, but a fresh note can make the routine feel more like a treat.
- Give the mixture a final shake, then pour it into your bottle. Label the bottle with the date – homemade rinses are best used within two weeks.
That’s it. You now have a natural mouthwash for dry mouth that you can swish after brushing, after meals, or whenever your mouth feels parched.
But let’s talk about the little things that can make or break the experience. Temperature matters: a lukewarm rinse feels gentler than icy water, especially if you have inflamed gums. Also, give the bottle a quick shake before each use – glycerin can settle, and a quick swirl re‑emulsifies the blend.
Real‑world examples
Sarah, a freelance graphic designer in Brussels, told us she struggled with night‑time dry mouth after a new antihistamine. She followed the steps above, but found the mouthwash too thick before bed. Her solution? Add a splash (about 20 ml) of extra distilled water, give it a shake, and the texture became perfect for a nighttime routine.
Tom, a travel‑loving teacher who’s often on long flights, keeps a small 50 ml travel bottle pre‑mixed. He uses a 1:1 water‑to‑glycerin ratio to keep the brew lightweight, then tops it up with a single drop of peppermint when he lands. The result? No sticky after‑taste, just a quick hydration boost mid‑flight.
When you start tracking how each batch feels, you’ll notice patterns. Maybe a higher glycerin level helps after a particularly dry summer, or a pinch more sea‑salt smooths the sting after a spicy dinner. Keep a tiny notebook – the habit of noting “morning, 10 ml, felt smooth” vs. “evening, thick, needed water” is pure gold for fine‑tuning.
One tip we often share with our community is to pair the rinse with a sugar‑free xylitol gum. The gum stimulates saliva flow while the rinse locks in moisture, creating a double‑action shield against dryness.
If you’re curious about why plant‑based formulas work so well, check out our article Why Use Plant‑Based Mouthwash for Oral Health – Stop Oral Care. It dives deeper into the science behind botanical humectants and how they complement the DIY approach.
Finally, a quick safety reminder: always use food‑grade essential oils, and patch‑test any new ingredient on the inner wrist before adding it to the bottle. If you experience any irritation, rinse with plain water and adjust the formula.
With these steps, you’ve turned a handful of pantry staples into a personalized, hydrating rinse that respects your mouth’s natural chemistry. Give it a try tonight, note how it feels in the morning, and tweak as needed. Your dry‑mouth relief is now literally in your own hands.
Step 3: How to Use and Store Your Natural Mouthwash
Now that you’ve mixed your own gentle formula, the real magic happens when you actually use it and keep it fresh. It might feel a bit like learning a new habit – think of it as training a small, daily ritual that your mouth will thank you for.
How to use it correctly
First, measure out about 10 ml (roughly two teaspoons) after you’ve brushed and flossed. Swish for 20‑30 seconds, letting the liquid glide over your tongue, gums, and the roof of your mouth. Don’t gulp it down – the goal is to let the humectants coat the oral tissues.
Then, spit it out. You’ll notice a subtle, cool sensation from the aloe and glycerin. Resist the urge to chase it with water; the residual film is what continues to attract moisture for the next few hours.
If you’re on the go, keep a 50‑ml travel bottle in your bag. A quick rinse after a coffee or a long flight can prevent that uncomfortable “sand‑paper” feeling that often follows air‑plane cabins.
Timing matters
Most people find the best results when they use the rinse twice a day – once in the morning to kick‑start saliva production, and once before bed to lock in hydration overnight. For those who experience severe xerostomia after medication, an extra mid‑day swish can be a lifesaver.
And what about after meals? A light swish after a salty snack can help neutralise the pH swing that would otherwise dry out the mouth. It’s a tiny step that makes a noticeable difference.
Storing your brew
Because we’re dealing with a water‑based mix, storage is key. Keep the bottle in a cool, dark place – a bathroom cabinet works fine, but avoid direct sunlight which can degrade the essential oils and aloe over time.
Seal the cap tightly after each use. Glycerin tends to settle, so give the bottle a gentle shake before you pour. If you notice any separation after a week, simply stir it with a clean spoon; the formula is still good.
Label the bottle with the date you made it. In our experience, a homemade rinse stays effective for about 10‑14 days. After that, the protective properties start to fade, and you’ll want a fresh batch.
Practical tips from real users
Maria, a teacher in Berlin, swears by a “night‑cap” routine: she adds an extra splash of distilled water to thin the mix before bedtime, which prevents the rinse from feeling too thick when she’s already a bit sleepy. The result? No dry‑mouth alarms the next morning.
Javier, a retiree travelling across Spain, keeps a mini amber bottle in his suitcase. He uses a 1:1 water‑to‑glycerin ratio for the flight, then adds a drop of peppermint essential oil once he lands. He says the quick boost of flavour makes the whole experience feel like a mini‑spa break.
Safety and troubleshooting
Always use food‑grade essential oils and do a quick patch test on your wrist before adding a new scent. If you ever feel a mild tingling, dilute the batch with a bit more water and note the change in your log.
If the rinse feels sticky after a few days, it could be that the glycerin has thickened too much. A 10‑ml addition of warm distilled water usually restores the smooth texture.
Keeping track of what works
We love a good notebook. Jot down the time of day, amount used, and any sensations you notice – “smooth”, “slightly gritty”, “minty fresh”. Over a week you’ll spot patterns, like needing a tad more glycerin after a hot summer day or a pinch extra sea‑salt after a spicy dinner.
For a deeper dive into ingredient tweaks and how different recipes stack up, check out our guide on natural toothpaste options. It’s packed with expert insights that translate nicely to mouthwash adjustments.
Finally, remember that a natural mouthwash is a supportive tool, not a replacement for professional dental care. If dryness persists despite consistent use, it’s worth chatting with your dentist – sometimes a prescription‑strength saliva substitute is the missing piece.
With these simple usage and storage habits, your DIY rinse becomes a reliable ally in the fight against dry mouth, keeping your smile comfortable and fresh all day long.
Step 4: Comparing Popular Natural Mouthwash Recipes
Okay, you’ve got a few formulas on your radar – now it’s time to see how they stack up. Think of it like a quick taste‑test at a coffee shop: you’re not just looking at the price tag, you want to know which brew actually wakes you up without the bitter after‑taste.
1. StellaLife VEGA Coconut Rinse
This commercial option is a fan‑favorite for people dealing with severe dry mouth, especially after cancer treatment or Sjögren’s. It’s a low‑alcohol (1.8 %) blend that mixes glycerin, aloe, and a handful of homeopathic botanicals. Users report a “spa‑day” feeling and noticeable moisture relief within minutes. The downside? It’s pricier than a DIY batch and you need to keep an eye on the 60‑day shelf life.
For the full ingredient rundown, check the product page on StellaLife’s site.
2. Classic Salt‑and‑Baking‑Soda Rinse
Old‑school but effective. Mix ½ tsp fine sea‑salt and ¼ tsp baking soda in a cup of warm water. The salt acts like a gentle antiseptic, while baking soda neutralises acidity that can dry out tissues. It’s cheap, easy, and you can whip up a fresh batch every day. However, over‑use can tip the pH balance and irritate enamel, so reserve it for short‑term boosts.
3. Aloe‑Vera‑Based Rinse
Aloe is a natural humectant and anti‑inflammatory – perfect for sensitive gums. Half a cup of pure aloe juice mixed with the same amount of distilled water gives a soothing, slightly sweet rinse. People love the cooling sensation after a spicy meal. The catch? Pure aloe can be a bit watery, so you may want to add a teaspoon of glycerin to thicken it.
4. Tea‑Tree Oil Mint Rinse
Tea‑tree oil brings antimicrobial power without the harshness of alcohol. Add 3 drops of food‑grade tea‑tree oil and a few drops of peppermint essential oil to a cup of lukewarm water. Swish for 30 seconds and spit. It’s great for fighting plaque, but remember: tea‑tree oil is toxic if swallowed, so keep the concentration low.
5. Coconut‑Oil Pulling
Oil pulling isn’t a rinse per se, but many dry‑mouth sufferers swear by it. Scoop a tablespoon of virgin coconut oil, let it melt, and swish for 5 minutes. The oil attracts lipophilic toxins and leaves a thin film that can lock in moisture. It’s a bit time‑consuming, and some people find the taste odd.
Quick‑Compare Table
| Recipe | Key Ingredients | Pros | Cons |
|---|---|---|---|
| StellaLife VEGA Coconut | Glycerin, aloe, homeopathic botanicals | Clinically endorsed, ready‑to‑use, pleasant taste | Higher cost, limited shelf‑life |
| Salt + Baking Soda | Sea‑salt, sodium bicarbonate, water | Very inexpensive, easy to make | Can disturb enamel pH if overused |
| Aloe‑Vera | Aloe juice, distilled water, optional glycerin | Soothes inflammation, natural sweetness | Thin texture, may need thickener |
| Tea‑Tree Mint | Tea‑tree oil, peppermint oil, water | Strong antimicrobial, fresh flavor | Potential irritation, must keep concentration low |
| Coconut‑Oil Pulling | Virgin coconut oil | Locks in moisture, reduces plaque | Time‑intensive, taste not for everyone |
So, which one feels right for you? Here’s a simple decision‑making checklist:
- Do you need a hassle‑free, ready‑made solution? Go with StellaLife.
- Is budget your top priority? The salt‑and‑baking‑soda mix wins.
- Do you have sensitive gums or frequent inflammation? Aloe‑vera is your go‑to.
- Looking for strong antibacterial power without alcohol? Try tea‑tree.
- Want a ritual that feels like a mini‑spa? Coconut‑oil pulling fits the bill.
In practice, many of our readers end up blending two approaches – for example, using a daily aloe‑glycerin rinse for everyday moisture and pulling with coconut oil on weekends for that extra detox boost. It’s a low‑effort way to get the best of both worlds.
If you’re still unsure, we’ve broken down the pros and cons of the top five natural mouthwashes in our Best natural mouthwash for gum disease guide – a handy reference when you’re picking a formula that fits your lifestyle.
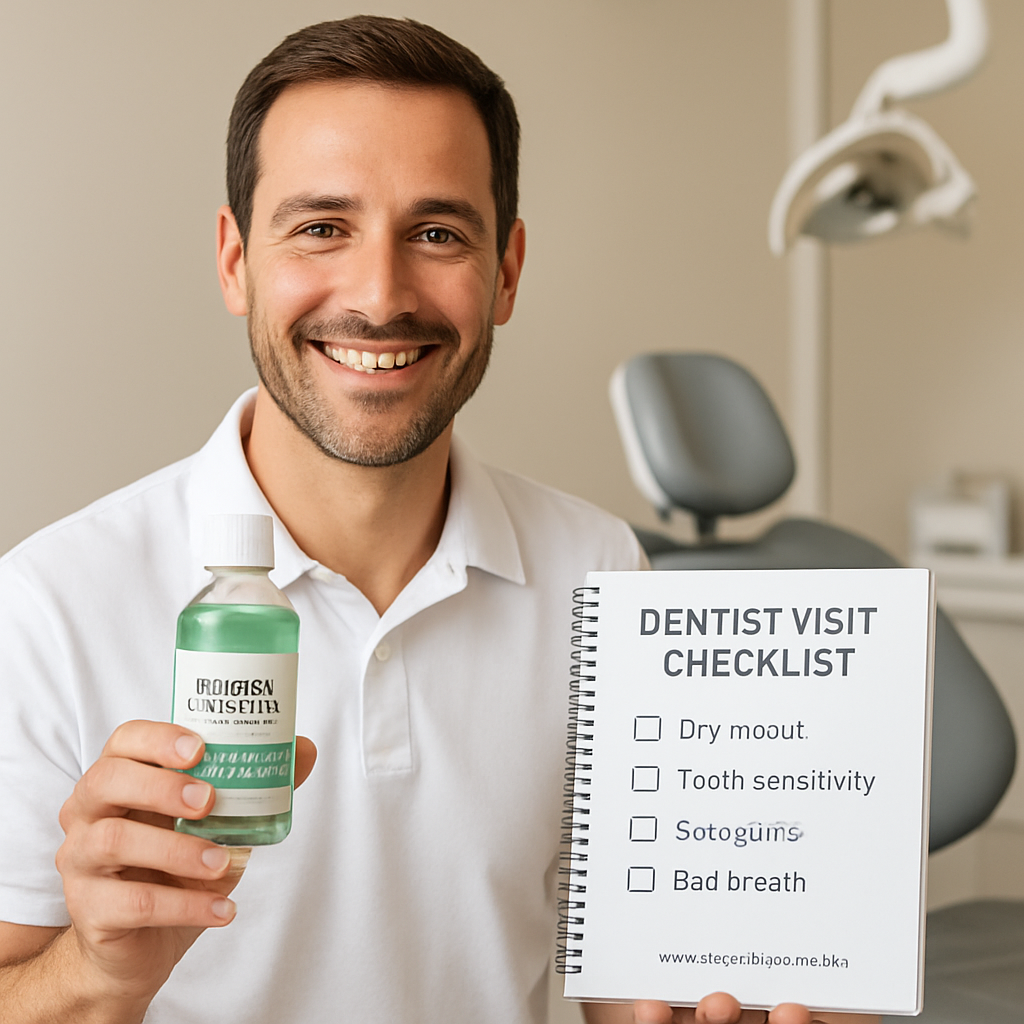
Step 5: When to Seek Professional Dental Care
We've walked through ingredients, recipes, and storage. But even the best natural mouthwash can't replace a dentist when warning signs start flashing red.
So, how do you know it’s time to pick up the phone? Think about the three classic signals that most people overlook until the problem is already buzzing in the background.
1️⃣ Persistent bad breath that won’t quit
Bad breath is more than an embarrassment – it’s often a symptom of reduced saliva, which lets bacteria run wild. The Mt. Perio article points out that without enough moisture, the bacterial overgrowth can turn a temporary whiff into a chronic issue.
If you’ve tried a natural mouthwash for dry mouth and the odor sticks around for days, that’s a cue to schedule a dental visit.
2️⃣ Ongoing sore throat, hoarse voice, or difficulty swallowing
Those nagging throat aches after meals, or a voice that sounds cracked, can be dry‑mouth side effects. When they linger, it means the oral tissues aren’t getting the protection they need.
In our experience, a dentist can check for deeper issues like xerostomia‑related infections or medication side‑effects that a DIY rinse can’t solve.
3️⃣ Unexplained tooth decay or gum irritation
Even with a gentle rinse, you might notice new spots of decay or gums that bleed easily. That’s the mouth’s way of saying the balance is off.
Professional care can pinpoint whether you need a prescription‑strength saliva substitute, a fluoride treatment, or a simple adjustment to your routine.
But here’s a practical checklist to help you decide when to book that appointment:
- Bad breath persists for more than a week despite regular rinsing.
- Throat soreness or hoarseness appears at least three times a week.
- New cavities, gum bleeding, or persistent inflammation arise.
- You’re on medication known to dry out saliva and symptoms worsen.
- Any sudden change in taste, swelling, or persistent oral pain.
If you tick any of those boxes, call your dentist ASAP. Early intervention can prevent cavities, gum disease, and even more serious infections.
Need a quick reminder of what a balanced natural mouthwash looks like? Check out our guide on natural mouthwash for periodontal disease – it breaks down the key ingredients and why they matter when you’re talking to a professional.
When you reach out, be ready with a few details: the ingredients you’ve been using, how often you rinse, and any symptoms you’ve tracked in your notebook. That way the dentist can tailor advice without guessing.
And remember, a dentist isn’t just there to fix problems. They can also recommend prescription‑grade saliva substitutes, prescribe antimicrobial mouthwashes, or adjust your medication regimen if it’s the root cause.
One final tip: if you’re traveling or living abroad, keep a small bottle of your favorite natural rinse handy and a note of the dentist you plan to see. It shows you’re proactive, and many clinics appreciate patients who come prepared.
Bottom line: natural mouthwash for dry mouth is a fantastic daily ally, but it’s not a substitute for professional assessment when warning signs appear.
Take a moment now, glance at your symptom checklist, and if anything feels off, make that appointment. Your future self will thank you.
FAQ
What exactly is a natural mouthwash for dry mouth and how does it work?
Think of it as a gentle, plant‑based rinse that adds moisture instead of stripping it away. Ingredients like glycerin act like a sponge, pulling water into the lining of your mouth, while aloe vera soothes inflamed gums. The result is a thin film that keeps saliva‑like hydration on your tongue and cheeks, easing that cotton‑mouth feeling without the sting of alcohol.
Can I safely use a DIY natural mouthwash if I’m on medication that causes dry mouth?
Absolutely, but a little caution goes a long way. Start with a modest recipe—distilled water, a pinch of sea‑salt, a teaspoon of vegetable glycerin, and a dash of aloe gel. Test a tiny sip first; if you notice any irritation, dilute a bit more. In our experience at Stop oral care, most patients find that a simple humectant blend eases medication‑induced dryness without interfering with their prescriptions.
How often should I rinse with a natural mouthwash for dry mouth?
Most folks get the best results by swishing twice a day: once after their morning brush to kick‑start saliva flow, and again before bed to lock in moisture overnight. If you’ve just taken a dose of a drying antihistamine, a mid‑day rinse can be a lifesaver. Aim for about 10 ml per use and let the film linger—no water‑down afterward.
Are there any ingredients I should avoid in a natural mouthwash?
Yes—steer clear of alcohol, sodium lauryl sulfate, and artificial sweeteners. Those can further dry out tissues or irritate sensitive gums. Also watch out for high‑strength essential oils; a few drops of food‑grade peppermint are fine, but more than that can cause a burning sensation. If you’re prone to allergies, skip citrus oils and stick to aloe, glycerin, and a pinch of sea‑salt.
How do I know if my homemade rinse has gone bad?
Because it’s mostly water‑based, look for changes in smell, texture, or colour. A sour or mouldy odor means microbes have gotten in—discard it immediately. If the mixture separates and won’t re‑blend after a good shake, that’s another red flag. As a rule of thumb, label the bottle with the brew date and aim to use it within 10‑14 days for peak freshness.
Can a natural mouthwash replace prescription‑strength saliva substitutes?
It can complement them, but it isn’t a full replacement for severe xerostomia. A natural rinse supplies surface moisture and soothing ingredients, while prescription substitutes often contain higher concentrations of electrolytes and bio‑active agents that protect teeth long‑term. If you notice persistent cracks, cavities, or difficulty swallowing despite regular rinsing, it’s time to ask your dentist about a stronger saliva aid.
Where can I find reliable natural mouthwash recipes or products?
Start with trusted dental‑focused blogs, scientific articles, or brands that publish their ingredient lists transparently. Many dental clinics share printable recipe cards, and you’ll also find step‑by‑step guides on reputable oral‑care sites. When you’re ready to buy, look for products that list glycerin, aloe vera, and sea‑salt as primary ingredients, and avoid hidden alcohol or synthetic flavours. A quick search for “natural mouthwash for dry mouth” will pull up several vetted options.
Conclusion
After wading through ingredients, recipes, and storage tips, you probably feel a bit more confident about tackling dry‑mouth discomfort.
Remember, the magic lives in the simple humectants – glycerin, aloe vera, a pinch of sea‑salt – that coax moisture back onto your gums without the burn of alcohol.
If you’ve tried the mix and it still feels a little thin or a tad thick, just tweak the water‑to‑glycerin ratio; a splash more water in the evening or an extra drop of glycerin in the morning can make all the difference.
So, what’s the next step? Grab a clean bottle, label today’s brew, and give yourself a quick 10‑ml swish after brushing.
Note how your mouth feels after an hour, then again before bed. Those tiny observations will guide you toward your perfect formula.
And don’t forget the safety net – if dryness persists, bad breath lingers, or you notice any irritation, it’s time to book a dental appointment. A professional can spot underlying issues that even the best natural mouthwash can’t fix.
In short, a natural mouthwash for dry mouth can become a low‑effort, high‑comfort part of your daily routine. Give it a try, track the results, and let your smile tell you whether you’ve found the right balance.